Seeing as you have clicked on this article on essential macOS terminal commands that you likely already know about the macOS terminal app. But because of those who might not, it is apple’s text-based or command-line interface that offers you access to the Mac operating system? IT teams and coders typically make use of the app but do not mean that it is not useful to every user on Mac.
A lot of the MacOS terminal commands might not be as useful to regular users, but there is a handful that would come in useful. So, we have put together some essential macOS terminal commands that most users or Mac, even the casual users should be aware of.
How to Use macOS Terminal Commands
Making use of the macOS terminal commands is not as hard as it seems, though it can be a bit intimidating.
In the terminal windows, you would have a command prompt where you would enter a command, which would usually come along with the option to make use of “Flags” or special symbols that modify the command’s behavior. Usually, they come after the command itself, alongside some value, like so:
command -f value
immediately after a terminal command has been entered, push on entering in other to initiate the command.
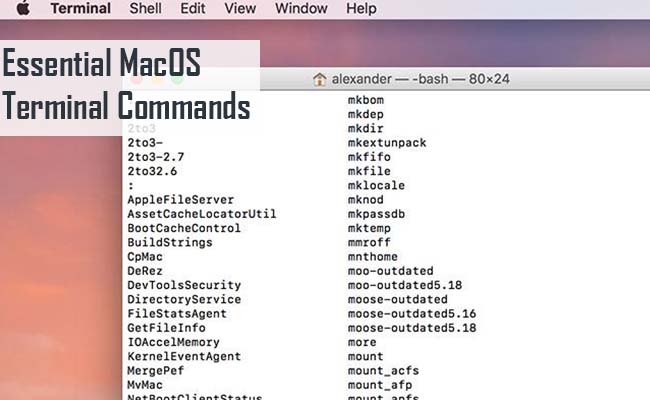
How to Pull up MacOS Terminal Application
To begin with: you should be aware of how to pull up the terminal application before you can make use of it. Well do not worry, you might have noticed it before, but you do not need to do some hocus pocus to open it, as Apple makes it available readily.
There are majorly two ways to access it, they include through Utilities and through the spotlight.
In other to access it through utilities, all you have to do is simply open your finder, go to applications, and then open the folder labeled utilities. Scroll down in other to find the terminal and double-click it to open.
The easiest way for you to run the terminal app is for you to make use of the spotlight, MacOS’s handy dandy search, and all-around help function.
- Press Command + Spacebar
- Right on the search bar that pulls up, type terminal, and then press return.
Most Useful Terminal Commands for macOS
Below I would be giving you 10 of the most essential MacOS Terminal commands that are just as useful to you as they are to other professionals making use of it. They include:
1. Update Your Software
You can make use of the terminal to check for new software updates also, download and install any that are available. In other to do this, type command: softwareupdate -i -a
2. Change Your Mac’s Sleep Settings
There are two major ways to change your Mac’s sleep settings: in the system preferences and using the terminal, which is a lot faster. If you want your Mac to Stay “Awake” for a specific amount of time, you can make use of the Command:
caffeinate -t <length of time>
Specify the length of time in seconds. If you do not want your Mac to go to sleep mode for 60 minutes, let’s say, put in 3,600 as there are 3,600 seconds in an hour. It would look like this:
caffeinate -t 3600
Also, you can make use of other flags besides -t. there’s -I to keep your Mac from going idle, -S to keep the whole system awake, and -d to keep your display from going into sleep mode.
3. Increase Dock Spacing
If you have a busy and crowded dock, then you can use the terminal to increase the space that is between apps on your dock to make it look a lot neater. Simple type:
defaults write com.apple.dock persistent-apps -array-add ‘{“tile-type”=”spacer-tile”;}’; killall Dock
Then click Return.
If you would like to remove the space later, simply right-click or Command-click on it and select Remove from Dock.
4. Change Screenshot Name
At default, your Mac would be making use of “Screenshot” as the default screenshot name. While nothing seems inherently wrong with that, it also means that you would have to individually change every screenshot’s filename. That can get quite tedious and time-consuming, especially if you would be working on a project that has to do with a lot of them.
You can save yourself some time by actually changing the default screenshot name. Type:
defaults write com.apple.screencapture name “New Screen Shot Name”
Replace the text new screenshot name using the name of your choice, of course still enclosed in quotes. Finish it with command:
killall SystemUIServer
5. Change Screenshot Format
By default, your screenshots would be placed in PNG format, and this means that every screen capture that you do on your Mac would be a PNG image unless you change it. Luckily, the terminal comes to the rescue once again. Simply type:
defaults write com. apple. screencapture type <format>
Replace the format using the preferred image of your choice. You can choose between JPG, GIF, TIFF, and RAW, which are great. If JPG is the format you chose, for example, it would look like this:
defaults write com. apple. screencapture type JPG
6. Compress and Password-protect a Folder
If you are interested in compressing a folder and you want to reduce its access, the terminal can aid you also. The first thing that you would need to do is to change the directory to your folder’s location. If your folder is located on your desktop, for example, simple type:
cd ~/Desktop/
Then type:
zip -er <output folder name.zip> <source folder name>/
So, if you have a folder named testing and you want to make use of the same name for your Zip file, you type:
zip -er Testing.zip Testing/
You would be prompted to enter your password, which you would have to do twice, pressing enter after every entry. Make sure that you type it correctly, as you won’t see any characters on the screen as you type (they’re still being recorded as the password though).
7. Display your Hidden Files and Folders
You can choose to hide your files and folders on your Mac in other to keep them away from prying eyes. If you wish to hide those hidden files, type:
defaults write com.apple.finder AppleShowAllFiles TRUE
Press Enter then Type:
killall Finder
Press Enter Again.
8. Shut Down or Restart Your Mac
If you want your mac shut down, you can just enter:
sudo shutdown -h now
you can also choose to restart your mac by typing:
sudo shutdown -r now
9. Make your Mac Talk
You can actually make your Mac Say whatever you want it to, and not just for the fun of it. In other to do that, type in:
say “text”
Simply replace the text above with whatever you want or need your Mac to say then press return. If you are interested in making your Mac, say, “Hello, my queen,” for example, just type:
say “Hello, my queen”
10. Wipe your Download History
Your mac tends to retain records of all your computer activities, which includes all your downloads. If you are interested in clearing your download history, or you just want to view it – the terminal app can help you with that. view your download history by typing:
sqlite3
~/Library/Preferences/com.apple.LaunchServices.QuarantineEventsV* ‘select LSQuarantineDataURLString from LSQuarantineEvent’
and to delete the entire thing, just type in:
sqlite3
~/Library/Preferences/com.apple.LaunchServices.QuarantineEventsV* ‘delete from LSQuarantineEvent’


