Press-on nails have revolutionized the world of nail art, offering a quick and convenient way to achieve stunning manicures without the hassle of traditional nail polish or acrylics. Whether you’re a nail art enthusiast or someone looking to enhance your style for a special occasion, learning how to apply press-on nails can help you achieve professional-looking results from the comfort of your home.
In this guide, we’ll take you through the step-by-step process of applying press-on nails for a flawless and long-lasting manicure.
What Are Press on Nail?
Press-on nails, also known as artificial or fake nails, are pre-designed and pre-manufactured nail boosts that are applied to natural nails to create a polished and stylish manicure.
However, these nails come in a variety of shapes, sizes, colors, and designs, allowing individuals to achieve a desired nail look. Without the need for salon visits or traditional nail polish application. Press-on nails are typically made from materials like acrylic, gel, or plastic.
Benefits of Press on Nails
Press-on nails offer several benefits, but below are a few of them so far:
- Convenience: Applying press-on nails is quick and straightforward, making them a convenient option for those who want a polished look without spending hours at a salon.
- Variety: Press-on nails come in a wide range of designs, colors, and lengths, allowing individuals to experiment with different looks for various occasions.
- Temporary: Press-on nails are not a permanent commitment like acrylic or gel nails. They can be easily removed whenever desired without the need for soaking or filing.
- No Drying Time: Unlike traditional nail polish that requires time to dry, press-on nails are ready to go as soon as they’re applied, eliminating the risk of smudging or smearing.
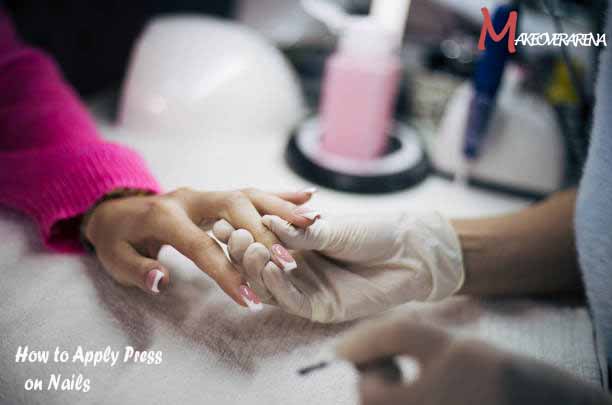
How to Apply Press on Nails
Here Is a step-by-step guide on how to apply press-on nails:
Step 1: Gather Your Supplies
Before you start, make sure you have all the necessary supplies at hand. These include press-on nails of your choice, nail glue or adhesive stickers (usually provided with the nails), a nail file, a cuticle pusher, alcohol wipes or nail polish remover, and a small bowl of warm water.
Step 2: Prep Your Natural Nails:
Start by removing any existing nail polish using an alcohol wipe or nail polish remover. Gently push back your cuticles using a cuticle pusher to create a clean surface for the press-on nails to adhere to. If needed, trim and shape your natural nails using a nail file.
Step 3: Choose the Right Size
Lay out the press-on nails in front of you and select the appropriate sizes for each of your natural nails. It’s important to choose nails that match the width and shape of your natural nails to achieve a natural look.
Step 4: Apply Adhesive
Depending on the type of press-on nails you have, you’ll either use nail glue or adhesive stickers. If you’re using glue, apply a small amount onto your natural nail and the back of the press-on nail. For adhesive stickers, simply peel off the backing and apply the sticky side to your natural nail.
Step 5: Applying the Press-On Nails
Carefully align the press-on nail with your natural nail’s cuticle and press it down firmly starting from the cuticle area and moving towards the tip of the nail. Hold the press-on nail in place for a few seconds to allow the adhesive to bond effectively.
Step 6: Shaping and Blending
Once all the press-on nails are applied, use a nail file to shape and blend the press-ons with your natural nails. File the tips of the press-on nails to your desired length and shape. Be gentle and avoid filing too aggressively to prevent damaging the press-ons.
Step 7: Finishing Touches
To ensure a long-lasting manicure, you can apply a clear top coat over the press-on nails. This will add extra shine and help secure the edges of the press-on, making them less likely to lift.
Step 8: Maintenance and Removal
Avoid excessive exposure to water for the first few hours after application to allow the adhesive to be fully set. If a press-on nail starts to lift, you can reapply a small amount of glue or adhesive to secure it. When you’re ready to remove the press-on nails, gently soak your fingers in warm, soapy water to loosen the adhesive, then gently pry off the press-on using a cuticle pusher.
Kiss Impress Press-On Manicure
KISS Impress is always on trend, bringing you irresistible colors and finishes with glitter, 3D crystals, and more. However, get in on the hottest colors, shapes, lengths, finishes, and custom art motifs. You can press on at home in minutes.
Other Press on Nails To Shop On
- Glamnetic Press On Nails – Angel – SHOP NOW
- Teenitor 288Pcs Matte Acrylic Short Square Fake Nails – SHOP NOW
- BTArtboxnails French Tips Gel Nail Tips – SHOP NOW
- Glamnetic Press On Nails – SHOP NOW
- Press On Nails Almond – BTArtbox Soft Gel –SHOP NOW
- Press On Nails Medium – SHOP NOW
- GLAMERMAID Press on Nails Medium Length – SHOP NOW
Conclusion
Applying press-on nails is a fantastic way to achieve stylish and professional-looking manicures without the time and commitment of traditional nail methods. By following these steps and paying attention to the details, you can enjoy stunning nails that last for days and enhance your overall style effortlessly. Experiment with different designs, colors, and lengths to express your unique personality and keep your nails looking fabulous.
CHECK THESE OUT:


