Facebook was created in the year 2004, and according to a report, by 2007 Facebook was reported to have over 21 million members that generate 1.6 billion page views each day.
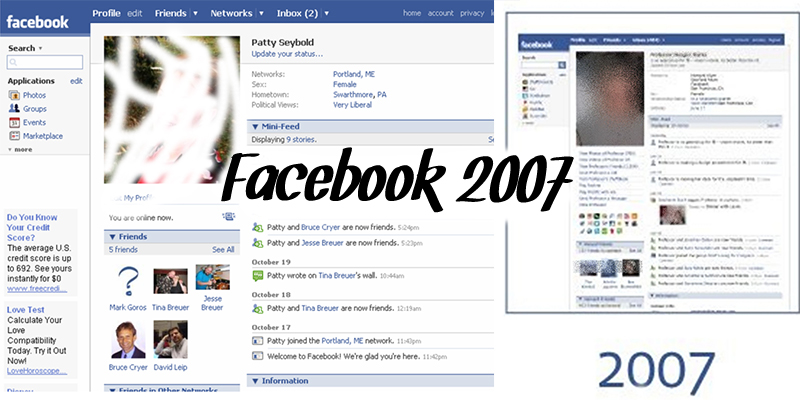
By 2007, everyone who was age 13 years and above and also has an email address was able to have access to Facebook Also in the year 2007, the Facebook News Feed was launched, this implies that you could now have access to different things that your friends had been doing all through the time you were not logged in.
Read Also >>> Facebook New Year Cover Photos: Facebook Cover Photo | Facebook Cover Photo Size
Facebook 2007: Setting Username on Facebook Steps/Procedure
It is a very easy process to set your username on Facebook. When you create a new account, Facebook has a default setting to automatically provide a username for you, but the decision to make use of this name is totally up to you.
Whenever you are ready to make use of Facebook. There are two different beats we will give you, the first method is through your desktop and the second method is through the Facebook page.
You can follow the steps below to set your Facebook username through your desktop:
- The first step you need to take is to log into your Facebook account on a desktop computer and then click on the dark blue triangle which is located at the top-right of the page.
- Next, From the drop-down menu, tap on the word “Settings”.
- On the next page, you will see a row displaying “Username”. This row shows you your current username, tap on “Edit.”
- After you have done that, type in your new username which you are interested in changing it to (if it is not available, a red X will pop up along with a message saying “Username is not available”).
- Finally, “Save Changes” and you can start making use of the new username. that you have set on Facebook.
Another way you can follow to reset Facebook your username is by making use of the Facebook page, these are simple steps for you to follow to successfully do that:
- First of all, Tap on the “About” section which is located on the left side of your page.
- Next, tap on the “Edit” option which is located next to the section for your page’s username.
- Finally, Type in the new username you feel like using, and if it is available, tap on “Create a username.”.
When you follow all the steps given to you above, you will be able to successfully reset your name on Facebook without any issue.
Viewing Facebook Ads Library
It is not a hard process to view Facebook Ads Library if you have the knowledge. The steps we will be providing below will make it easier for you to view the Facebook Ads Library. You can follow these steps whenever you are ready:
- The first step you need to take is to go to the Page by tapping its name in your News Feed or by inputting it on the search bar.
- Next, tap on ‘Go to Ad Library’ right below Ads.
- Finally, you will be able to view Ads that the Page is presently running in your country.
Above is how to view your Facebook Ads library.
More Recent Posts
- How to Get a Val from Facebook – How to Get a Facebook Val | How to Download Facebook App
- Facebook Template – How to Change Facebook Template on your Page | Using Facebook Template
- Mercari Vacation Mode: How to Put Your Mercari Sellers Account on Vacation Mode
- Facebook for Business: Facebook Business Page | Facebook Business


